
The Basics of 3D Rendering: Transforming Your House Exterior from Dream to Reality
Imagine standing in front of your dream house, gazing at its beautifully landscaped garden, meticulously designed architecture and the play of sunlight on its exterior surfaces. You can practically feel the breeze rustling the leaves and the sun’s warmth on your skin. But here’s the catch: The house exists only in your imagination, a vision waiting to be brought to life. Enter the world of 3D rendering with “yousee.studio,” a leading platform specializing in interior design rendering. This remarkable technology can transform your dreams into visual reality, allowing you to experience your ideal living space before it’s even built.
Table of Contents
Understanding the Magic of 3D Rendering
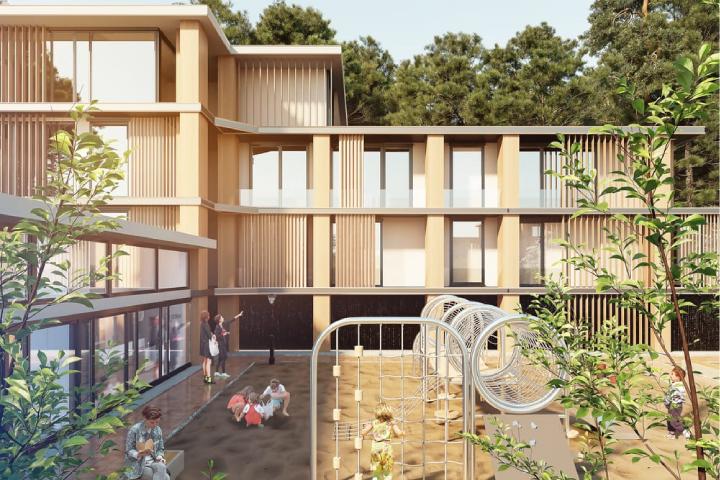
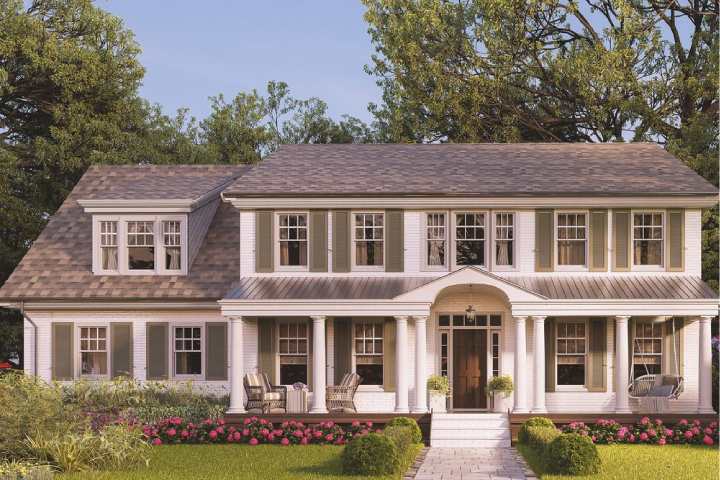
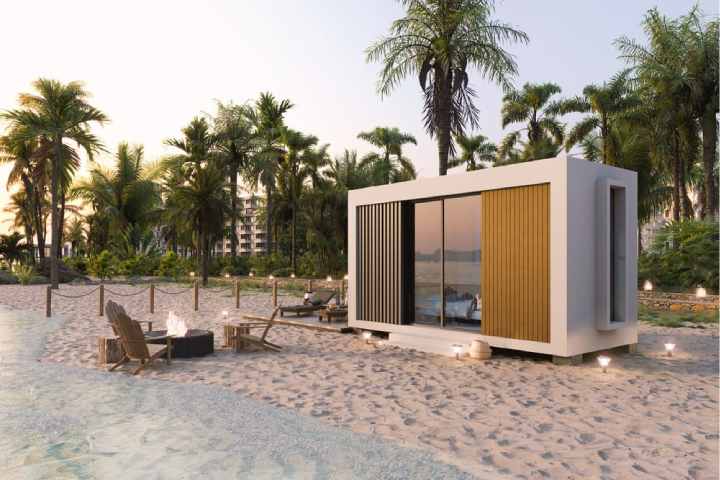
At its core, 3D rendering is the process of generating a two-dimensional image from a three-dimensional scene. This technology enables architects, designers, and homeowners to create highly realistic visualizations of spaces and structures yet to be built. Whether it’s a cozy cottage, a modern mansion, or a futuristic skyscraper, 3D rendering can bring life into architectural concepts and allow you to explore them from every angle.
The Intricate Process Unveiled
Creating a compelling 3D rendering involves steps to form a seamless and captivating visual representation. Here’s an overview of the process:
- Modeling the Scene: The journey begins with creating a 3D model of the exterior space. This digital replica includes all the elements—walls, windows, doors, roof, landscaping, and more—that will eventually constitute the final visual.
- Texturing and Material Mapping: Every surface in the scene is given a texture and material that mimics real-world attributes. The roughness of a stone wall, the glossiness of a glass window, and the sheen of a metal railing—each detail contributes to the authenticity of the render.
- Setting the Lighting: Just like the sun transforms the appearance of a physical space, lighting in 3D rendering plays a crucial role. Designers place virtual light sources to simulate natural and artificial lighting conditions, creating a play of light and shadow that adds depth and realism.
- Applying Cameras and Perspectives: Think of the camera as your eyes within the 3D environment. By placing cameras at strategic viewpoints, designers control what the viewer sees. Adjusting focal lengths and angles can evoke different emotions and highlight architectural features.
- Rendering: The magic moment arrives when all the elements are in place and the scene is ready to be rendered. This process involves calculating how light interacts with surfaces, a complex computation resulting in the final image.
- Post-Processing: After rendering, the image may undergo post-processing to enhance colors, contrast, and other visual elements. This step fine-tunes the vision to achieve the desired aesthetic and atmosphere.
The Role of 3D Rendering in Architectural Design
In architectural design, 3D rendering serves as a bridge between imagination and realization. It enables architects and designers to communicate their ideas effectively to clients, stakeholders, and construction teams. The benefits of utilizing 3D rendering in architectural design are manifold:
- Visualization: 3D renders offer a crystal-clear visualization of the design concept. Clients can explore every detail, from the windows’ shape to the furniture placement.
- Design Iteration: With 3D rendering, designers can easily experiment with different design options and materials. Changes can be made swiftly, facilitating the iterative design process.
- Realism: Traditional 2D drawings can only convey much about the outcome. 3D renders, on the other hand, provide a lifelike representation that captures the essence of the design.
- Decision Making: Clients and stakeholders can make informed decisions based on accurate and realistic visualizations. This eliminates ambiguity and reduces the likelihood of surprises during construction.
- Marketing and Communication: 3D renders are powerful marketing tools in promotional materials, websites, and presentations. They enable architects to showcase their expertise and attract potential clients.
As we delve deeper into the world of 3D rendering, we’ll explore the technologies, techniques, and tools that transform architectural concepts into stunning visuals. From the intricacies of creating materials and textures to the nuances of lighting and camera perspectives, we’ll uncover the secrets behind achieving photorealistic exterior renders that bridge the gap between dream and reality. In the following sections, we’ll dive into the specifics of each crucial element in the process and understand how they come together to create captivating visuals.
Crafting Materials and Textures for Realism
One critical factor contributing to the photorealism of 3D exterior renders is the careful crafting of materials and textures. Just like in the real world, surfaces in a 3D scene have distinct properties that interact with light in unique ways. Achieving authenticity requires a meticulous approach to recreating these materials digitally

Realistic Materials, Digital Magic
In 3D rendering, materials are much more than just colors and patterns. They encompass a range of visual and tactile attributes, including reflectivity, roughness, transparency, and more. Here’s a closer look at how different material properties influence the final render:
- Diffuse Reflection: This property determines how light scatters when it hits a surface. Matte surfaces, such as painted walls, absorb light and exhibit diffuse reflection. Glossy surfaces, on the other hand, reflect light in a more organized manner, creating highlights and reviews.
- Specular Reflection: Highlights are the bright spots that appear on shiny surfaces when light hits them at specific angles. Adjusting the specular reflection of materials can make them appear more or less reflective, enhancing realism.
- Roughness: Affects how smooth or rough a surface appears. A highly polished surface will have low roughness and produce crisp reflections, while a rough surface will scatter light in various directions, creating softer thoughts.
- Transparency and Opacity: Glass, water, and other transparent materials are essential to exterior renders. Achieving convincing transparency requires a balance between transparency and opacity, allowing light to pass through while reflecting and refracting it.
The Texture Puzzle: Mapping and Detailing
Textures play a pivotal role in mimicking real-world surfaces. These digital images are applied to the 3D model to simulate the visual characteristics of different materials. Various mapping techniques ensure that textures are applied accurately to other parts of the model. Some standard texture mapping methods include:
- Diffuse Maps: These maps define a surface’s base color and pattern. They provide the canvas on which other material properties are layered.
- Normal Maps: Simulate surface micro-details without increasing the actual geometry. They create the illusion of bumps, dents, and ridges.
- Specular Maps: Control the intensity and location of specular highlights on a material. They help achieve a more accurate representation of how light interacts with the surface.
- Displacement Maps: Modify the geometry of the 3D model, pushing and pulling vertices to create 3D details. This technique is beneficial for adding intricate surface details.
The Art of Lighting and Shadow Play
Lighting is undoubtedly one of the most critical aspects of creating a photorealistic 3D exterior render. How light interacts with a scene can completely transform its mood and atmosphere. Just as a photographer uses lighting techniques to capture the perfect shot, 3D artists manipulate virtual light sources to achieve their desired effect.
Natural and Artificial Light Sources
In a 3D exterior render, natural and artificial light sources are carefully placed to mimic real-world lighting conditions. Sunlight, often considered the most challenging yet rewarding light source, can dramatically alter the appearance of a scene based on its angle and intensity. Artificial lights, such as those from street lamps, windows, and fixtures, add depth and dimension to the stage.
Soft and Hard Shadows
The type of lighting used determines whether shadows are soft or hard. Soft shades are achieved when a light source is significant or diffused, creating gradual transitions between light and shadow. Hard shadows, on the other hand, result from a small, focused light source, creating distinct, well-defined shadows.
Global Illumination and Ambient Occlusion
Global illumination (GI) simulates the indirect bouncing of light within a scene. It takes into account how light reflects off surfaces and illuminates other objects. This technique contributes to the realism of renders by adding soft, subtle lighting effects that mimic real-world scenarios. Ambient occlusion (AO), on the other hand, simulates the occlusion of light in crevices and corners, adding depth and realism to the scene.
As we unravel the complexities of achieving photorealistic exterior renders, we uncover the significance of each step in the process. Materials and textures lay the foundation for authenticity, bringing surfaces to life through the interplay of light and properties. Lighting and shadow manipulation, the cornerstone of visual storytelling, breathe emotion into the scene, allowing viewers to connect with the space on an emotional level.
Creating Visual Narratives: The Art of Composition and Camera Perspectives
The culmination of a photorealistic exterior render lies in its ability to convey a story, evoke emotions, and captivate the viewer’s imagination. The final puzzle involves harnessing the power of composition and camera perspectives to craft a compelling visual narrative.
Framing the Story: Composition Techniques
Effective composition guides the viewer’s eye, highlighting key elements and conveying a sense of order and balance within the scene. While the rules of composition are rooted in traditional art and photography, they are equally applicable to 3D rendering.
- Rule of Thirds: Imagine a grid with two equally spaced horizontal and vertical lines, dividing the frame into nine equal parts. Critical elements along these lines or at their intersections create a balanced and visually appealing composition.
- Leading Lines: Lines that draw the viewer’s attention towards the main subject or focal point can add dynamism and depth to a scene. These lines can be architectural features, roads, or other prominent linear elements.
- Foreground, Middle ground, Background: Dividing the scene into distinct layers adds depth and dimension. Placing objects of interest in the foreground, middle ground, and background creates a sense of scale and perspective.
The Magic of Focal Lengths
The choice of focal profoundly impacts the final render’s aesthetics. Different focal lengths create varying perspectives that affect how the viewer perceives depth and proportion.
- Wide-Angle Lens: A wide-angle lens offers a broad field of view, making it ideal for capturing expansive exteriors. It can exaggerate depth and perspective, making objects in the foreground appear larger while compressing elements in the background.
- Standard Lens: A normal lens approximates the perspective the human eye sees. It maintains proportions and is suitable for portraying a scene naturally and realistically.
- Telephoto Lens: A telephoto lens magnifies distant objects, creating a compressed perspective. This is useful for isolating specific architectural details or capturing scenes from a distance.
Visual Storytelling Through Camera Angles
The choice of camera angle can evoke specific emotions and enhance the story being told by the render. Here are camera angles commonly used in exterior rendering:
- Eye-Level View: This angle provides a realistic and relatable perspective, making viewers feel like they are standing in the scene. It’s effective for showcasing architecture and landscape elements.
- Bird’s-Eye View: A top-down view allows viewers to see the entire scene and its layout. This angle helps present master plans, site designs, and landscaping.
- Low-Angle View: Shot creates a sense of grandeur and dominance. It’s often used to emphasize tall buildings and dramatic architecture.
- Dutch Angle: A tilted or skewed angle adds a dynamic and slightly unsettling feeling to the scene. This technique is used to convey tension or unease.
Rendering Beyond Reality
While photorealism is the ultimate goal, there are instances when pushing the boundaries of reality can yield captivating results. Hyperrealism takes photorealism to the next level by accentuating details to an almost surreal extent. This approach can result in stunningly detailed and aesthetically pleasing images, sparking curiosity and intrigue.
In conclusion, the journey from a 3D model to a photorealistic exterior render is meticulous and multifaceted. Each step, from modeling and texturing to lighting and composition, contributes to the final masterpiece. By understanding the principles of real-world aesthetics and mastering the tools of the trade, 3D artists can transform their creative visions into immersive and awe-inspiring visual experiences.
As technology advances, the possibility of achieving photorealism in 3D rendering is limitless. Whether it’s a breathtaking architectural visualization or a mesmerizing landscape render, creating photorealistic exterior renders is a testament to the fusion of creativity, skill, and innovation.